Showing posts with label gift. Show all posts

Saturday, May 18, 2013

Birthday meerkats

My son turned two a few weeks ago. Amazing! We had a family party at our house on the day of his birthday (since it was a Sunday), and I managed to squeeze in a few crafty things. I tried to think of something that a toddler would actually consider a fun, special treat for a birthday party. Well, something he likes to do, but rarely gets to, is pull out Kleenex. So how about he gets a whole bunch of his very own Kleenex boxes he can pull as much from as he wants? In addition, when we've taken him to the zoo, his favorite animals were the meerkats. So I made meerkat Kleenex boxes!

Meerkat Kleenex boxes

I drew this using these photos as reference [1, 2, 3, 4, 5, 6, 7, 8] and got it printed on the new wrapping paper option at Spoonflower. (You may recognize the background as being the same one I used for the brolgas, in a more "dried grass" colorway.) The rows are five inches tall to match the boxes, so I just cut them in to strips and glue-sticked them on. I also tried to make the repeat match the circumference of these boxes, but I made an error somewhere so it's about 1/4" too long. Oh well!

Continuing the meerkat theme, I also made meerkat cupcakes.

Meerkat cupcakes

These are banana bread. I was originally going to try to make cream cheese frosting and color it with jam, but then I saw the speculoos (like ground up cookie paste) at Trader Joe's and used that instead. No mixing needed! The ears and eye patches are quartered prunes, and the eyes and noses are blueberries. I have wonderful memories of all the themed decorated cakes my mom made for my birthday each year, and even though my son is too young to request his own, I had a lot of fun continuing the tradition.

However, I think my son's favorite part of his birthday was that we removed the baby gate blocking off the kitchen for the day, to make it easier to serve lunch to everybody. The side effect of course, was that he could wander in whenever he wanted and open all the cabinets. That was just beyond exciting.

Wednesday, December 12, 2012

That eucalyptus pattern gets around

Back when I created a "family crest" pattern, I created two sub-patterns for it. One was a simple line drawing of eucalyptus leaves. I used it again to create a little more depth in the pomegranate cookie design. I recently had a chance to take it for a spin again.

First, some backstory. When I was a kid, every year at Thanksgiving we'd gather with the extended family on my mom's side at an old house on an orange orchard that the family owned but nobody occupied year-round. The bathroom at the back of the house had these strange old (probably decades old) paper hand towels that just hung there yellowing and never got used. They had pictures of sobbing seahorses,with the text "Have you ever seen a seahorse cry? You should, he has no hands to dry!" So very odd.

Once the house finally got sold and its contents were packed up and divided among certain family members (a saga too long to even touch on now), nobody was able to put those aside. Perhaps some are still in a box somewhere; perhaps none exist. I had been wishing for years that I could get my hands on one to scan it and turn it into a real towel. Well, fast-forward to this year, when my brother was gearing up to host Thanksgiving at his house again, and he suggested that I should just draw my own version and make those the new Thanksgiving towels. Challenge accepted!

For the text, I found a couple of retro fonts I liked: Roadbrush and Simplesnails. I searched for seventies-inspired colors and decided on these:
oshkosh
Color by COLOURlovers

Next I had fun drawing some distraught seahorses. I framed the whole thing using the rounded lattice previously seen here. Then I thought it still looked a bit plain so I put that trusty eucalyptus pattern very lightly in the background (though rotated 20 degrees, since putting it next to text made the horizontal repeat wayyyyy too obvious).

I decided to make the overall size six inches by nine inches, so that it would be nicely visible when appliqued onto a hand towel but not take up the whole front. Plus that size meant I could fit exactly nine on a fat quarter of cotton-linen (which Spoonflower has wider than the plain standard cotton) like so:

Have you ever seen a seahorse cry? You should; he has no hands to dry!

Then, since I had a streak to maintain, I got the printed fabric on literally the day before we headed out of town for Thanksgiving, and started sewing the towels in the car. The towels themselves are from here.

Seahorse towel

Each patch is just blind-stitched on to the towel. I managed to finish all nine in time, on the drive up and during naptimes at my mother-in-law's house. (The above picture shows me sewing in the car - you can imagine my toddler son directly to the right of this, asleep in his carseat.)  I gave eight to my brother and kept one for myself. I had prewashed the towels and the fabric before we left, so they were ready to put into service as soon as we arrived!

Seahorse towel

It'll be fun to get to use these every year now. They seemed to be a hit with my extended family. I still cherish the idea of someday miraculously finding the original.

Oh yeah, the other pattern in that family crest? That would be the little repeat of handguns. I just got a notice that somebody ordered FIVE YARDS of it...on SILK. As my husband said, that's a heck of a set of pajamas!

Wednesday, January 11, 2012

Maren's quilt, finally finished

Maren's Flag Quilt Completed

Maren's Flag Quilt Completed

So, last we saw the quilt for my niece, I was still doing the quilting. I really wanted to finish it time to give it when we were visiting family during the holidays, since the one for her older brother was done as well. But then of course I added to the last-minute present-making by deciding to sew the baby computer science books, leaving even less time for the quilt. I just can't get these things done with time to spare - that would be too easy. And since I already printed up the quilt labels for the back that said 2011, well, I couldn't make myself a liar by waiting and giving them at some point in 2012!

The last few days before we left town, I did manage to get all of the quilting done, leaving just the binding to go. I had again used purchased binding (from this seller on Etsy), so I didn't have to make that too. The last night before departure, I got the binding pinned on, then packed it up along with my sewing kit. I felt a little bad about the extra luggage, since we have to take so much stuff to travel with the baby. So much for trying to travel as light as possible on my own account! The binding is a nice yellow/cream floral with delicate stripes.
Maren's Flag Quilt Completed

From there it was a certain amount of déjà vu of the quilt for my older niece - I sewed in the car during the times when the baby didn't need direct entertainment (or his toys retrieved from the other side of his car seat where he kept throwing them...). I think in the end I only lost one pin under my seat that I haven't been able to find again. I still had some more to go when we got to my mother-in-law's house, but I was still able to carve out some time during naps and in the evening to wrap it up, and I finished sewing on Christmas Eve morning! I even had enough time that I was able to wash it before wrapping it up. Fortunately I'm a faster sewer than I used to be.

Here's how the quilting looks from the front and the back:
Maren's Flag Quilt Completed

Maren's Flag Quilt Completed
The backing is flannel, which I was able to get on Amazon. I know the pinks don't exactly go with the pinks I chose for the front, but it was just too cute and perfectly on-theme to skip.

You can kind of see all the quilting in this shot - there's a stylized Gemini symbol on either side of each flag.
Maren's Flag Quilt Completed

Maren is only seven months old, so it'll be a little bit before she can form an opinion of it herself, but her mother (my sister-in-law) really liked it. Cord also really took to his - as soon as it was unwrapped, he just wanted to hold on to it, and didn't even want to let his father hold it up so everyone could see. Cord's quilt looked even cozier than it did before after its washing - I'm quite pleased with how the quilting turned out:
Waterpolo puppies quilt completed

Definitely worth the time to make these! Every stage was really fun - designing the tops, deciding on backing & binding and how to quilt them, sewing them together, and of course giving them to my nephew and niece.

Saturday, December 31, 2011

Sewing together Baby's Book of Computer Science

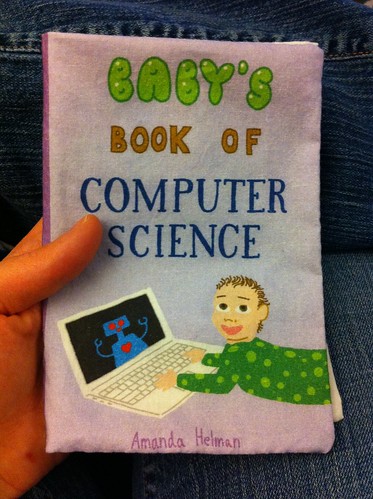
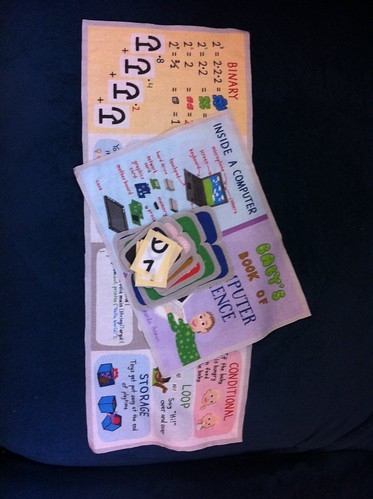
There are directions on how to sew together the Baby's Book of Computer Science on the fabric itself, including diagrams, but I thought I'd put together a post with images showing how I sewed it together. I ended up making a few small changes to my written directions, since I had to write them before getting to actually sew it together and all.

Baby's Book of Computer Science Construction - part 1
Being an organized sort, I cut out all the pieces and trimmed them down to the marked seam allowance. The gray (or yellow) 1/4" outlines are all supposed to be hidden in the seam.

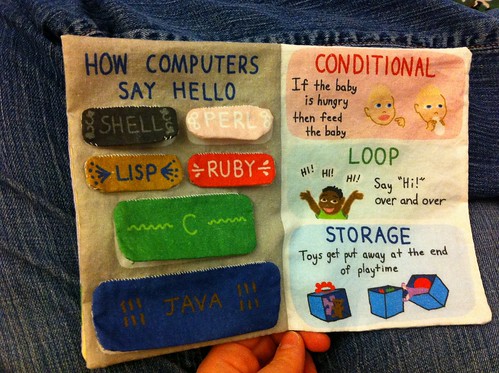
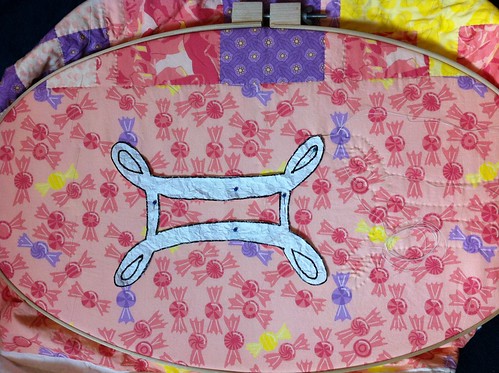
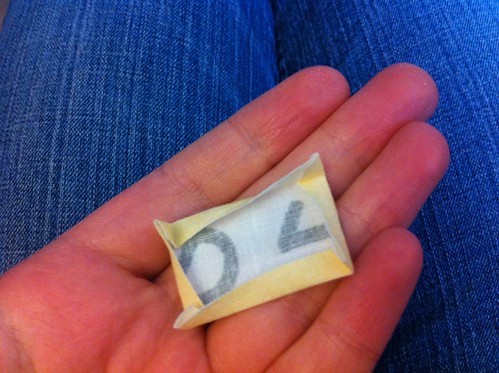
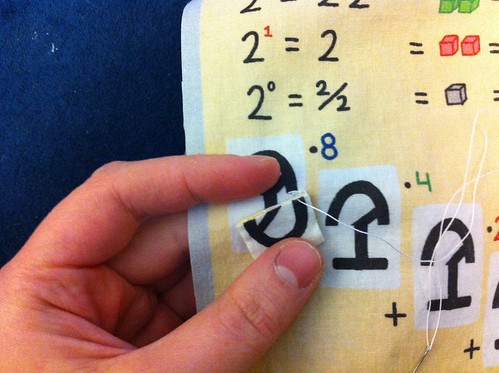
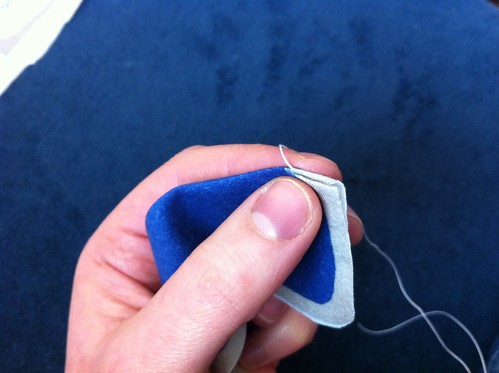
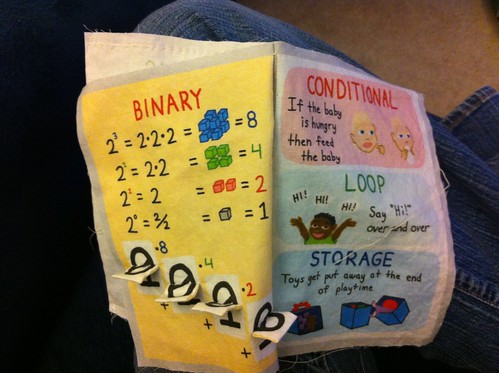
The first part of the sewing I tackled was to finish all the flaps. I started with the 1/0 flaps for the binary page. Contrary to my printed directions, I decided that they were too small to sew inside out and then flip right side out, so I just folded them together right side out to start with and simply blind-stitched them.

First, I folded in the seam allowance:
Baby's Book of Computer Science Construction - part 2

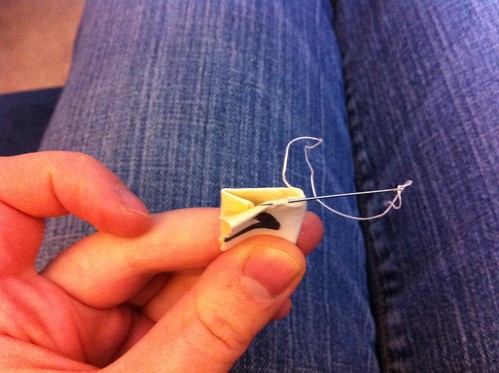
Then folded it in half and started blindstitching from the folded point:
Baby's Book of Computer Science Construction - part 3

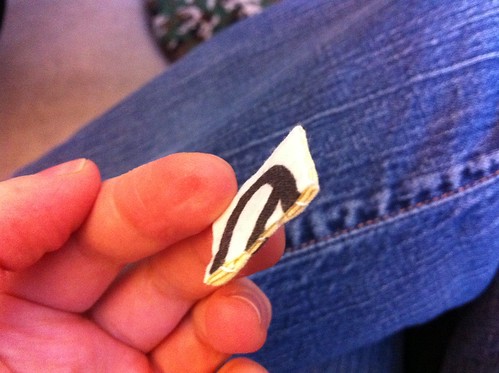
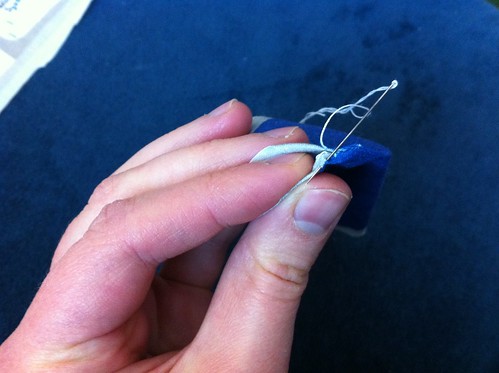
Here's what the finished flap looks like. You don't need to stress about the neatness of the stitching too much since this side gets sewn down to the page.
Baby's Book of Computer Science Construction - part 4

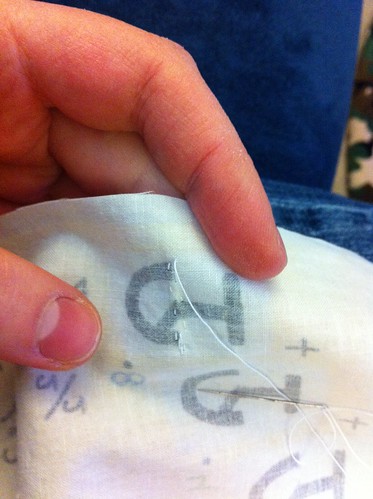
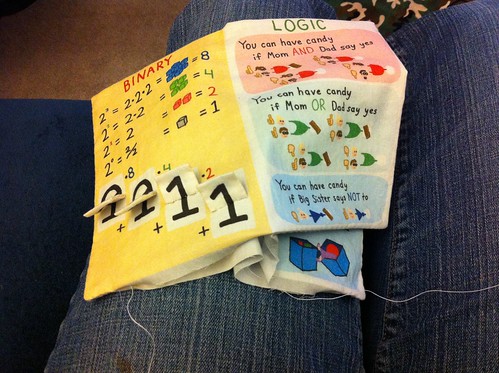
Once I sewed all four of those flaps that way, I sewed them onto the binary page. Since I wanted them to be equally able to be in the up and down position, I sewed them so they'd default to sticking straight out of the page. Not quite sure if there is a name for the exact stitching I did, but it was pretty much like blindstitching. With each stitch I went all the way through the bottom of the flap and sewed it to the page on alternating sides.
Baby's Book of Computer Science Construction - part 6

Which looks like this from the back when it's all done:
Baby's Book of Computer Science Construction - part 5

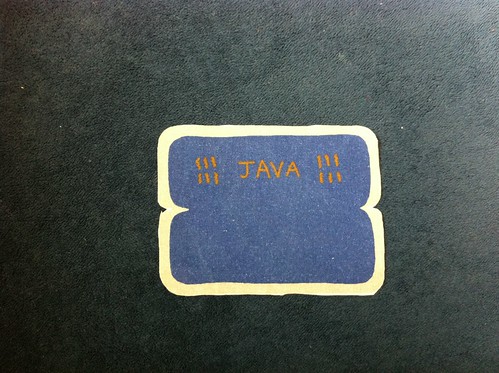
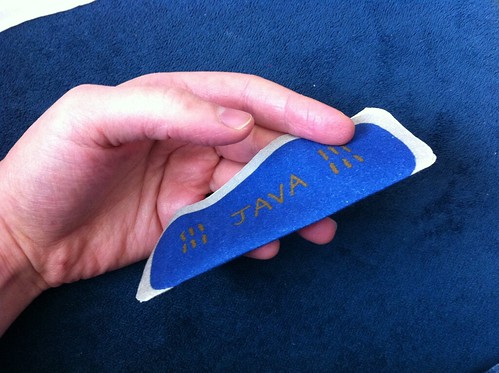
Next, I worked on the flaps for the page with all the different "Hello World" programs.
Baby's Book of Computer Science Construction - part 7

I did try to sew these wrong sides together at first, and then turn them right side out with just an inch or so to go in order to minimize blindstitching, but decided that like the 1/0 flaps these are just too small to make it worth it. So I started out by folding them in half.
Baby's Book of Computer Science Construction - part 8

To get the corners to curve nicely, start with just a little reverse tuck.
Baby's Book of Computer Science Construction - part 9

With each stitch, turn it in a little further.
Baby's Book of Computer Science Construction - part 10

Then just keep turning the seam allowance in and blindstitch all the way around.
Baby's Book of Computer Science Construction - part 11

Once I sewed all the language flaps together, I sewed them onto the page. Since I wanted these to lie flat by default, I whipstitched them on.
Baby's Book of Computer Science Construction - part 12

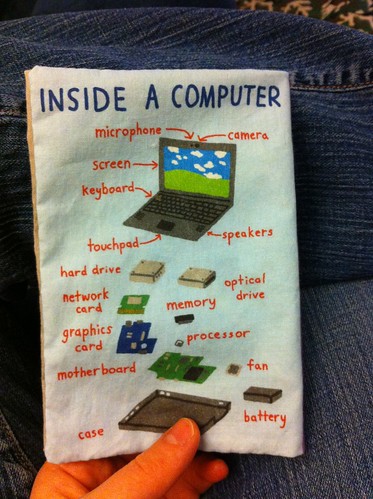
Once all those flaps were in place, I heaved a sigh of relief. Ahhh. If you're following along as you sew one of these yourself, relax! The hardest part is done. Next, I folded the four page segment (that was now thoroughly be-flapped) in half right sides together, and sewed the two middle pages together top and bottom.
Baby's Book of Computer Science Construction - part 13

When that was done it looked like this:
Baby's Book of Computer Science Construction - part 14

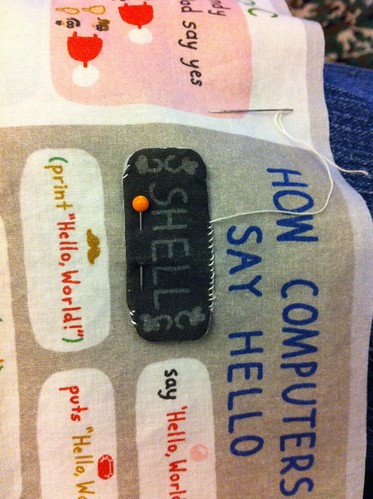
Closing in! Next step was to pin the two-page segment onto the four-page segment, right sides together. I triple-checked that all the pages had "up" in the same direction.
Baby's Book of Computer Science Construction - part 15

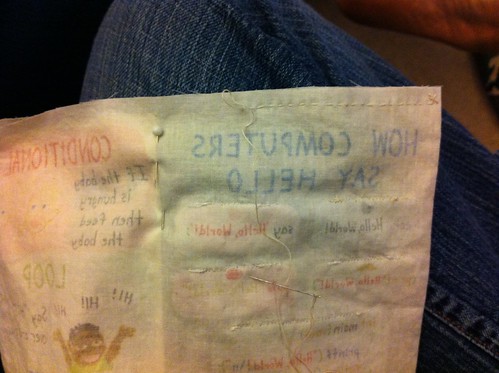
I sewed all around except for a few inches along the bottom, then turned it right side out. I used a skewer to push the corners out to get them as square as possible.
Baby's Book of Computer Science Construction - part 16

Then it was just a matter of blindstitching together those last few inches.
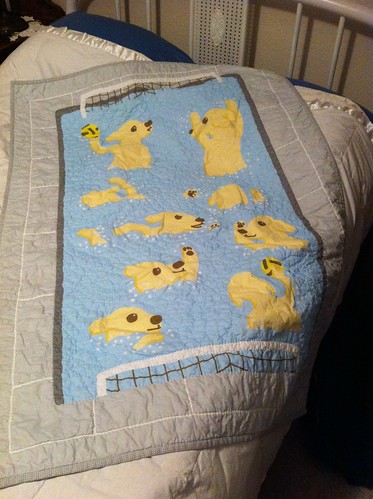
Baby's Book of Computer Science Construction - part 17

See 
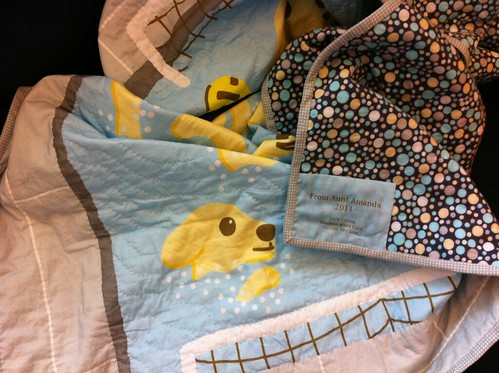
this post again for images of the completed book!

I also included a little rectangle on the fabric that can be used to create a little closure for the book (if you add a button, snap, velcro, or the like) but I decided to skip it.

Thursday, December 29, 2011

Lots to catch up on

Whew! Another holiday season survived. This one was particularly special, being my firstborn's first Christmas.

I have lots of stuff to blog about, but the main accomplishment I wanted to mention was that I sewed up two copies of the Baby's Book of Computer Science (fabric page here) in time to give one copy to each set of nephews/nieces! The book was a big hit with both sides of the family, so I'm really glad I was able to finish the sewing in time. I am really proud of this thing.

Baby's Book of Computer Science - front cover
Baby's Book of Computer Science - pages 1 & 2
Baby's Book of Computer Science - pages 3 & 4
Baby's Book of Computer Science - back cover

I'm going to sew another copy for my son now, since being just eight months old he wasn't going to mind if I didn't have it done in time to give it to him strictly on Christmas.

Along with sewing those two books, I also managed to finish the baby blanket I had in progress so that I could give that one, and the other finished one, when we were visiting family for the holidays, even though they weren't actually Christmas presents. The last thing I finished was the pie-of-the-month calendar, which I gave to my mother. In the rush I didn't get a picture of it completed, but all I did was a basic hem around all four edges so it pretty much looks exactly like the picture of the plain fabric.

I'm really pleased with the amount of crafting I've been able to do over the last few months, so here's to keeping it up in 2012!

Wednesday, December 7, 2011

The thrilling story of the Robot baby quilt

So, I made this quilt for my first nephew. By the time my first niece was around, I had my Spoonflower account and wanted to use that to create the top for a whole-cloth quilt for her. My brother is a giant nerd like I am, and sci-fi figures heavily into our mental space. So, robots!

Robot baby quilt

The backing & binding is flannel cut from a bed sheet, like the first one I did.

Robot baby quilt

As you can see, I actually finished & gave this quilt almost three years ago. Amazingly for me, I actually got it done in time for the baby shower, before she was born! But only just barely - and there's a reason why I never got any photos of it until now.

I spent a lot of time getting the design the way I wanted it. I decided doing a grid of five robots by seven robots would produce nicely-sized bots. So I sketched 17 different robots, each of which was colored in twice (one flipped the other direction), plus an 18th robot which was only used once. Can you find the unique robot? Hint - it's a reference to a sci-fi TV show! My brother's favorite show, in fact. Next, I got the robots into the grid - I tried to make sure that duplicate robots didn't end up in the same column or row, and that there were no groupings dominated by a single color. It ended up being like a very colorful form of Sudoku. I suppose it would have been easier if I'd placed the robots first, and then colored, but no matter!

By the time I finished all that, there was no time to wait for a proof from Spoonflower before ordering the final cloth. There are a few tweaks I would have made...but heck, I'm pretty sure if I don't point those things out, nobody else would notice. So I'll say no more.

By the time I had the printed top delivered, and assembled it for quilting, there wasn't much time before the shower. All our family is up in Northern California, so we were going to visit my husband's family for a day or two on the way to the shower. I made sure to make the bias tape for the binding before we left since that's pretty much impossible to make on the road. I was still furiously quilting at the start of the trip. I went with a simple quilting scheme - an oval around each robot. I finished that up at my mother-in-law's house and started on the binding. The day of the baby shower, we left her house to drive to the town where the shower was (two hours away) and I kept sewing the binding in the car. I think I had two sides left where the binding needed to be sewn to the back when we arrived at my mother's house, just an hour or two before we needed to go to my brother's house for the shower!

Next, it got really hilarious. My brother, completely unaware of my frantic efforts to finish sewing, kept calling and asking me to prep things for the shower! I can't remember all of it, but at least one request was to look through our parents' stuff to find some obscure AV cable for the music setup he wanted to use for the shower. I delegated to mom instead, ha ha.

I still had a few inches to sew when we had to leave to make it to my brother's house on time - about 10 minutes away. I grabbed a gift bag, so I could just shove the blanket in and not have to wrap it, and kept sewing in the car. I finished just as we pulled in to their street and shoved it in the bag. That is cutting it close!

It was a hit. I had kept the whole thing a surprise from my brother and sister-in-law, so they were delighted to realize that I had not only sewn the quilt, but drawn the design as well. My brother recognized my drawing style. They later told me that it made a fun playmat as well - my niece would sit on it and poke at the robots.

Since the party was so hectic, and I only had the finished quilt in my possession for about five seconds, I didn't have a chance to get a picture of it. I never managed to remember to get a picture at visits after that either. However, this year at Thanksgiving I finally was able to make some time and grabbed a few quick snaps.

Robot baby quilt

Hopefully I'll have a few more finished quilts to post here soon!

Wednesday, November 16, 2011

Finished!

Waterpolo puppies quilt finished
I finished the quilt for Cord! Even though I still have three more baby blankets to make, I feel like I'm back on track since the rest are for babies still well under a year old.
Waterpolo puppies quilt finished
I was debating how much of the outlines around the pool to quilt, and eventually decided I would be happiest if I did all of it. That includes the edge of the water and the pool, the grout lines, and the outline of the main frames of the goals.
Waterpolo puppies quilt finished
I printed out a tag for the back (including care instructions!) via Spoonflower as well. You can see the backing fabric through it, but I kind of like the effect. The backing fabric is a flannel that I bought from Fabric.com via Amazon. The batting is Quilter's Dream Cotton, in the "request" loft, which is the thinnest.
Waterpolo puppies quilt finished
For previous quilts, I've made the bias tape for the binding myself, but that's something that takes me awhile. I haven't ever had a space where it's easy to lay out those large squares and draw lines on them, plus I just can't seem to get it lined up correctly when sewing the initial cylinder. So in order to help things along, I shopped around for some bias tape on Etsy. I was hoping to find a grey tape with white polka dots, so I was really happy to find this! The seller (Beewise Goods) only had her tapes listed in packages of two yards each, but I needed about five to bind this quilt. So I messaged her, and happily she was able to sell me a package of six continuous yards! The only way it could have been more perfect is if it was double-fold, but it looks great, and most importantly, I was able to finish it!
Waterpolo puppies quilt finished
In the end, it took me just over a month from when I got all of the main components to finishing this up! I'm definitely a faster sewer than I used to be.

Monday, October 24, 2011

Continuing quilting

So, I've decided how I'm going to do the rest of the quilting for Maren's quilt. She's a Gemini, so I'm going to quilt a large Gemini symbol on either side of each of the five flags. Here's the first one:
One repeat quilted
I don't believe in any of that astrology malarkey, but it's a rich vein of symbolism and personalization! I found this script-like version of the symbol, which has a pleasing appearance. So I blew it up to ten inches tall (the same size as the flags) and printed it out. To make it more pliable and fabric-like, I thoroughly crumpled up the paper. I learned that trick in art class in elementary school!
Quilting template
To use it for quilting, I just pin it in place.
Template in use
With a design this curvy and continuous, there's really no way to avoid having to turn the quilt every which way to maintain the right-to-left sewing direction. But in order to minimize stopping & starting threads, I have a strategy to sew each symbol using just one length.

I start a long thread at one corner, with half on each side of the starting point (that's the stage the photo above is at). With the first half, I sew around one "edge" of the design - going around the outside of the outer loops, and the inside of the rectangular section. For the parts in the interior of the design, I skip under the quilt top.

With the second half, I do the other "edge" - the insides of the outer loops, and the outsides of the rectangular section. Notice I haven't cut out the holes for the insides of the outer loops. I just eyeball those when I sew them, since they're pretty small and easy to line up once the first half is already quilted.

The hardest part of this process is getting the template pinned to the right place, so that it's lined up vertically with the flag and horizontally with the existing quilted symbols.

Friday, October 21, 2011

Quilting progess on baby blankets

So the two baby blankets I'm working on are both well into the process of quilting. For Maren's quilt, I started by doing (faux) stitch-in-the-ditch to outline all the pieced-looking segments. This was probably the easiest quilting I've ever done! The lines were of course very easy to follow, and since it was a cheater print there were no thick seam allowances on the underside to navigate. I've finished all of that, and am still contemplating exactly what I'll do to fill in the spaces on either side of the column of flags.
Maren flags quilt partially quilted

For Cord's quilt, I couldn't decide right away what to do. I didn't want to sew over the puppies, and I wanted to do something in the blue segments to suggest splashing/rippling water, without being too time-consuming. I thought about doing stipple quilting, but that definitely failed the "time-consuming" test, as well as being denser than I wanted. I finally settled on doing wavy lines. I focused on just keeping them ad-hoc, and not stressing over getting them perfectly parallel or concentric. That was kind of hard for me! I had to keep stopping myself from picking out segments and redoing them just a few millimeters away. I kept reminding myself that even if I see all kinds of minute imperfections, the likelihood of other people noticing (if I don't point them out) is practically nil. And there's the old crafter's saw, "finished is better than perfect." I do want to give it as a gift as soon as I can!
Waterpolo puppies quilt partially quilted
All the quilting I have left on this one is the outline of the pool and the pool deck.

Tuesday, October 18, 2011

Second quilt with custom fabric

I mentioned in yesterday's post that I was using Spoonflower to create custom fabric for two baby quilts in progress, but only showed the one for my niece. Here's the one in progress for my nephew:
Waterpolo puppies quilt laid out for basting

It's golden lab puppies playing water polo! The inspiration for this is that my brother-in-law is a water polo coach (and my sister-in-law played in high school), and they have a golden lab. So I put those elements together into what I think is a quite adorable scene.

This picture was taken when I had it laid out for basting. I'm still trying to decide exactly how I will quilt it. That's why I've started on the quilting for Maren's first, even though she's younger - I already know exactly how I'm starting that.